Welcome! Are you the proud owner of JLab wireless earbuds? These sleek, wireless wonders offer you the freedom to enjoy your favorite tunes without the hassle of tangled cords. But what happens when you need to cut them off? Don’t worry; I’ve got you covered! In this article, I will guide you through the process of cutting off JLab wireless earbuds step by step.
Why is it important to learn how to cut off jlab wireless earbuds?
Before we dive into the nitty-gritty, let’s understand why learning this skill is essential. There may come a time when your earbuds become damaged or need repair. In such situations, knowing how to cut them off properly can save you time and money. By mastering this technique, you can easily replace the damaged parts or even repurpose them for other uses. Plus, it’s always handy to have this knowledge in your DIY toolkit!
Overview of the article’s main focus
In this article, my main focus will be providing you with a comprehensive, step-by-step guide to cutting off JLab wireless earbuds. You’ll learn the necessary precautions and safety measures to take before starting the process. I’ll walk you through each step, from gathering the required tools to making a clean cut. Additionally, I’ll address common troubleshooting issues that may arise and provide solutions to ensure a successful outcome. By the end of this guide, you’ll have the confidence and expertise to tackle any cutting needs with your JLab wireless earbuds.
So, are you ready to unleash your inner DIY guru? Let’s dive into the details and learn how to cut off JLab wireless earbuds like a pro!
Understanding the Components of JLab Wireless Earbuds
Introduction to the different parts of JLab wireless earbuds
To effectively cut off JLab wireless earbuds, it’s crucial to understand their components. These earbuds consist of several key parts that work together to deliver exceptional audio quality and comfort. Let’s take a closer look at these components:
-
Earbud Housing: The earbud housing contains the drivers, which are responsible for producing sound. It also houses the electronic components that enable wireless connectivity.
-
Ear Tips: The ear tips provide a comfortable fit and help to block out external noise, enhancing your listening experience. They come in various sizes to accommodate different ear shapes.
-
Cables: While JLab wireless earbuds are designed to be cordless, they often have a short cable connecting the two earbuds. This cable houses the necessary wiring and controls for audio playback and device connectivity.
-
Control Buttons: Located on one or both earbuds, the control buttons allow you to adjust volume, change tracks, answer calls, and activate voice assistants.
Explanation of the potential reasons for cutting off the earbuds
Now that we’re familiar with the components, let’s explore the potential reasons why you may need to cut off your JLab wireless earbuds. Here are a few common scenarios:
-
Damaged Cables: Over time, the cable connecting the earbuds may become frayed or damaged due to regular use or accidental tugs. Cutting off the damaged portion and replacing it with a new cable can restore functionality.
-
Customization: Some users may wish to modify their JLab wireless earbuds to meet their specific preferences. Cutting off certain parts, such as the cable or the ear tips, allows for customization options like using a longer cable or experimenting with different ear tip materials.
-
Repurposing Components: If you have a broken pair of JLab wireless earbuds, you can salvage the working components, such as the drivers or control buttons, to use in other DIY projects or repair other earbuds.
Understanding the components and the potential reasons for cutting off JLab wireless earbuds sets the foundation for successfully navigating the cutting process. In the next section, we’ll discuss the precautions and safety measures you should take before proceeding.
Precautions and Safety Measures
When it comes to cutting off JLab wireless earbuds, it’s crucial to prioritize safety and take necessary precautions. By following these measures, you can ensure that neither the earbuds nor you are at risk of harm. Let’s delve into the importance of these precautions and the safety measures you should implement.
Importance of taking necessary precautions before starting the process
Before you grab your tools and get to work, it’s important to understand why precautions are vital. Taking necessary precautions minimizes the chances of accidents, damage, or injury during the cutting process. It allows you to approach the task with a clear focus and ensures the best possible outcome. So, let’s outline a few key precautions you should consider before cutting off your JLab wireless earbuds.
-
Disconnect the earbuds: Before you begin, make sure the earbuds are disconnected from any audio device or power source. This prevents any accidental damage to the earbuds or interference during the cutting process.
-
Protective eyewear and gloves: It’s always a good idea to wear protective eyewear and gloves to shield yourself from any flying debris or potential injury. Safety should be your top priority throughout the process.
-
Work in a well-lit area: Ensure you have ample lighting in your workspace. This will help you see the components clearly and avoid any accidental slips or cuts.
Safety measures to ensure no damage is caused to the earbuds or the user
Now that you understand the importance of precautions, let’s discuss the safety measures you should implement during the cutting process. These measures will help safeguard both your JLab wireless earbuds and yourself.
Use the right tools: Ensure you have the appropriate tools for cutting off the earbuds. Opt for sharp, precision cutting tools that are specifically designed for delicate electrical components. This will minimize the risk of damaging the earbuds or causing any unnecessary strain.
Work with precision and patience: Take your time during the cutting process. Rushing may lead to errors or accidental damage. Carefully follow the step-by-step guide to ensure a clean and precise cut.
By taking these precautions and implementing safety measures, you can confidently proceed with cutting off your JLab wireless earbuds. Remember, it’s better to be safe than sorry!
Step-by-Step Guide: How to Cut Off JLab Wireless Earbuds
Are you ready to embark on your earbud-cutting journey? Fear not! I’ll be your guide, walking you through each step with precision and clarity. Just follow these simple instructions, and you’ll be cutting off your JLab wireless earbuds like a pro in no time.
A. Step 1: Gathering the required tools
First things first, let’s make sure you have all the necessary tools at your disposal. You’ll need:
- Small wire cutters or a sharp utility knife
- Precision screwdriver set
- Heat shrink tubing (optional but recommended)
- Electrical tape
- Patience and a steady hand
Having these tools within reach will ensure a smooth and efficient cutting process.
B. Step 2: Identifying the specific area to cut
Take a close look at your JLab wireless earbuds and locate the area where you intend to make the cut. This will depend on your specific needs, whether it’s to repair a damaged section or customize the earbuds to your liking. Identify the precise spot where you want to separate the earbuds.
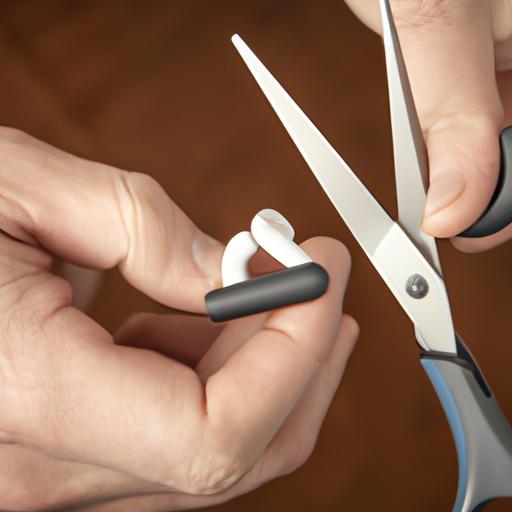
C. Step 3: Making the precise cut using recommended tools
Once you’ve determined the cutting point, it’s time to put those tools to work. If you’re using wire cutters, gently grip the earbud wire and make a clean cut at the desired location. Alternatively, a sharp utility knife can be used, ensuring a precise incision. Take your time and exercise caution to avoid any accidental damage.
D. Step 4: Ensuring a clean and smooth cut
After making the cut, inspect the ends of the wires to ensure a clean and smooth finish. If necessary, use a precision screwdriver to carefully remove any excess material or insulation. This step is crucial for maintaining the aesthetics and functionality of your JLab wireless earbuds.
E. Step 5: Checking for any loose connections or damage
Now that the cut has been made, it’s important to check for any loose connections or potential damage. Carefully examine the exposed wires and ensure they are securely attached. If there are any signs of damage, such as frayed wires or loose connections, it may be necessary to repair or replace the affected components.
F. Step 6: Final testing and ensuring functionality
Before considering your cutting journey complete, it’s time to put your JLab wireless earbuds to the test. Reconnect the earbuds and ensure they are functioning correctly. Test both audio output and wireless connectivity to guarantee a seamless experience. If any issues arise, revisit the previous steps to troubleshoot and resolve the problem.
Congratulations! You’ve successfully navigated the step-by-step guide to cutting off JLab wireless earbuds. With your newfound skills, you can now repair, customize, or repurpose your earbuds as needed. So go ahead, unleash your creativity, and enjoy your JLab wireless earbuds in a whole new way!
Troubleshooting and Common Issues
Addressing Potential Problems During the Cutting Process
Cutting off JLab wireless earbuds may seem straightforward, but like any DIY project, it’s essential to be prepared for potential hiccups along the way. Here, I’ll address some common problems that may arise during the cutting process and provide solutions to help you overcome them.
1. Difficulties in Identifying the Specific Area to Cut
Sometimes, determining the exact location to cut can be challenging, especially if the earbuds are compact or have intricate designs. If you find yourself struggling to pinpoint the precise area to cut, try the following:
- Inspect the Earbuds: Examine the earbuds carefully, looking for visible indications such as seams or weak points where the cutting should be focused.
- Research or Seek Guidance: Utilize online resources, user manuals, or even reach out to JLab customer support for guidance on the specific earbud model you have.
2. Making a Clean and Precise Cut
One crucial aspect of cutting off JLab wireless earbuds is ensuring a clean and precise cut. Sloppy cuts can lead to further damage or affect the functionality of the earbuds. To achieve a professional-looking cut, consider the following tips:
- Use the Right Tools: Utilize sharp and precise cutting tools such as small wire cutters or precision scissors to ensure a clean cut without applying excessive force.
- Take It Slow: Patience is key. Make small, controlled cuts rather than rushing through the process. This approach minimizes the risk of accidental damage to the internal components.
Providing Solutions to Common Issues Encountered
While cutting off your JLab wireless earbuds, you may encounter specific common issues. Don’t worry; I’ve got you covered with some practical solutions:
1. Loose Connections or Damaged Internal Components
During the cutting process, it’s crucial to be mindful of any loose connections or potential damage to the internal components. If you notice any of these issues, follow these steps:
- Secure Loose Connections: Gently reconnect any loose wires or components, ensuring they are securely in place.
- Assess for Damage: Inspect the internal components for any visible damage. If you identify any, it’s advisable to consult a professional or contact JLab customer support for further assistance.
Remember, safety is paramount throughout the process. By addressing potential problems and having solutions at your fingertips, you can confidently navigate the cutting process and achieve successful results. Now, let’s move on to the final section of our guide to wrap things up!
Conclusion
In conclusion, learning how to cut off JLab wireless earbuds is a valuable skill that can save you time and money in the long run. By following the step-by-step guide provided in this article, you can confidently tackle any cutting needs with your earbuds.
We began with a brief overview of JLab wireless earbuds and highlighted the importance of learning this skill. Understanding the components of your earbuds is crucial before attempting any modifications. We also emphasized the need for precautions and safety measures to ensure a smooth and safe cutting process.
Throughout the step-by-step guide, we covered everything from gathering the necessary tools to making a precise cut. We stressed the importance of ensuring a clean and smooth cut, as well as checking for any loose connections or damage. By following these steps, you can successfully cut off your JLab wireless earbuds without compromising their functionality.
Additionally, we addressed common troubleshooting issues that may arise during the cutting process and provided solutions to overcome them. Our aim is to empower you with the knowledge and expertise to handle any challenges you may encounter.
Remember, practice makes perfect, so don’t be afraid to give it a try! If you ever need assistance, feel free to refer back to this guide or explore other related resources.
Now it’s time to put your newfound skills to the test and confidently cut off your JLab wireless earbuds. Enjoy the freedom to customize, repair, or repurpose your earbuds as you see fit. Happy cutting!