Introduction
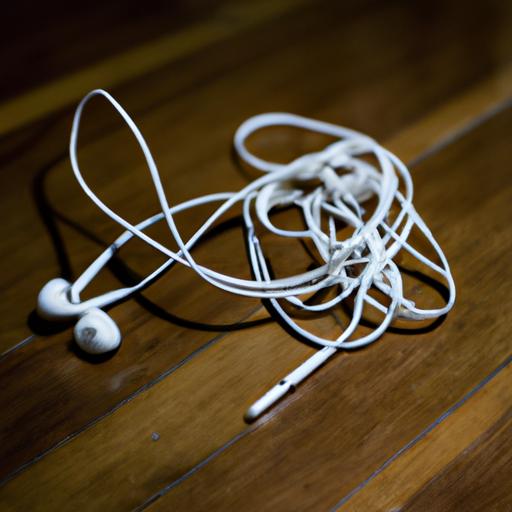
Imagine being immersed in your favorite tunes, only to discover that the sound quality is compromised by dirt and grime on your earbud headphones. Frustrating, isn’t it? Keeping your earbuds clean is not only vital for an enjoyable audio experience but also essential for hygiene and longevity. In this guide, I’ll show you the ropes of maintaining crystal-clear sound by revealing the secrets of effective earbud headphone cleaning.
Importance of keeping earbud headphones clean
Our trusty earbuds accompany us through our daily adventures, but they also encounter a multitude of germs, debris, and earwax along the way. Neglecting their cleanliness not only affects the audio quality but also poses potential risks to our ear health. Regular cleaning ensures that your earbuds remain free from harmful bacteria and maintain optimal performance.
Benefits of regular cleaning
Cleaning your earbud headphones paves the way for a whole new level of listening pleasure. By removing dirt, sweat, and earwax build-up, you restore the audio fidelity, allowing every beat and melody to resonate with clarity. Moreover, clean earbuds contribute to a comfortable fit, reducing the risk of ear irritation and discomfort during prolonged use. With proper maintenance, you can prolong the lifespan of your beloved earbuds and save yourself from the hassle of premature replacements.
Overview of the article’s content
Now that we understand the significance of keeping earbud headphones clean and the advantages it brings, let’s delve into the nitty-gritty details. In the following sections, I’ll provide you with a comprehensive step-by-step guide on how to clean your earbuds effectively. We’ll explore the essential materials needed, safety precautions to consider, and troubleshooting tips for common issues. Additionally, I’ll share valuable insights on maintaining clean earbuds and offer suggestions on preventing future problems. So, grab your earbuds and let’s embark on this journey to unlock the power of pristine sound.
Understanding Earbud Headphones Cleaning
Common issues caused by dirty earbuds
Dirty earbuds can lead to a myriad of issues that compromise your listening experience. One of the most common problems is reduced sound quality. Accumulated debris and earwax can clog the sound ports, resulting in muffled or distorted audio. Additionally, unclean earbuds can harbor bacteria, leading to potential ear infections or skin irritations. By neglecting their cleanliness, you not only sacrifice audio clarity but also put your ear health at risk.
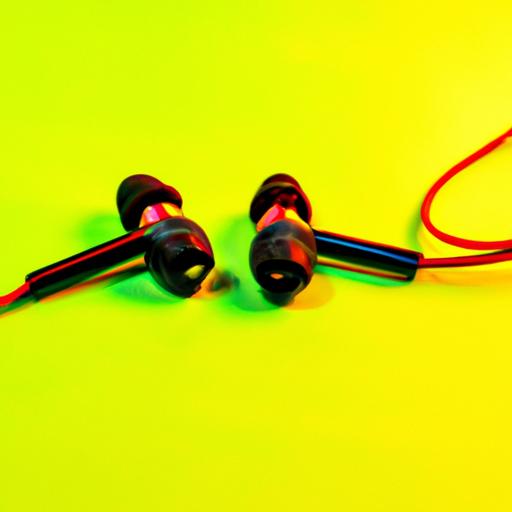
Materials needed for cleaning
To effectively clean your earbud headphones, you’ll need a few simple materials. Start by gathering a soft, lint-free cloth or microfiber cloth. These materials are gentle enough to clean your earbuds without causing any damage. You’ll also need a mild cleaning solution, such as isopropyl alcohol or a mixture of water and mild soap. Avoid using harsh chemicals or abrasive cleaners, as they can harm the delicate components of your earbuds.
In addition to the cleaning materials, consider having some cotton swabs or toothpicks on hand to remove stubborn debris from hard-to-reach areas. It’s important to exercise caution when using these tools to avoid damaging the inner workings of your earbuds.
Safety precautions to consider
While cleaning your earbud headphones is a relatively simple task, it’s crucial to take some safety precautions to prevent any mishaps. First and foremost, ensure that your earbuds are disconnected from any audio devices before starting the cleaning process. This eliminates the risk of accidentally damaging the earbuds or the connected device.
When using cleaning solutions, apply them sparingly to a cloth or cotton swab rather than directly on the earbuds. Excessive moisture can seep into the internal components and cause irreversible damage. Additionally, be gentle when cleaning and avoid applying excessive pressure, as it may dislodge or damage delicate parts.
Now that we have a better understanding of the common issues caused by dirty earbuds, the materials needed for cleaning, and the safety precautions to consider, let’s move on to the step-by-step guide on how to clean your earbuds effectively.
Step-by-Step Guide: Cleaning Earbud Headphones
Step 1: Removing ear tips and cushions
To kickstart your earbud cleaning routine, begin by gently removing the ear tips and cushions from your headphones. These components are often detachable and can be easily separated from the main body. Take extra care not to damage or misplace them during this process.
Step 2: Wiping away visible debris
Now that the ear tips and cushions are out of the way, it’s time to tackle the visible debris on your earbuds. Grab a soft, lint-free cloth or a cotton swab and delicately wipe away any dirt, dust, or earwax that may have accumulated on the earpiece surface. Remember, gentle motions are key to prevent any damage to the delicate components.
Step 3: Using cleaning solutions or wipes
For a deeper clean, consider using specialized cleaning solutions or pre-moistened electronic wipes. These products are designed to effectively remove grime and disinfect your earbuds. Apply a small amount of the cleaning solution to a cloth or use the pre-moistened wipes to gently wipe the entire surface of the earbuds, including the earpiece and cable. Ensure that you follow the manufacturer’s instructions and use only products that are safe for use on electronics.
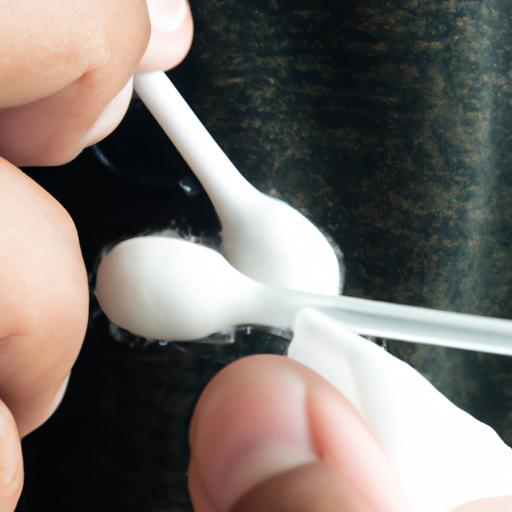
Step 4: Cleaning the ear tips and cushions separately
While you’re in the cleaning mode, don’t forget about the ear tips and cushions. These components can accumulate dirt and earwax over time, affecting both comfort and audio quality. To clean them, dampen a cloth or cotton swab with a mild soap solution and gently wipe them clean. Rinse them thoroughly and allow them to air dry before attaching them back onto the earbuds.
Step 5: Drying the earbuds thoroughly
After completing the cleaning process, it’s crucial to ensure that your earbuds are thoroughly dry before using them again. Excess moisture can damage the internal components and compromise the sound quality. Set your earbuds aside in a clean, dry area and allow them to air dry completely. Avoid using heat sources or hairdryers, as excessive heat can cause damage.
By following these simple steps, you can maintain the cleanliness and functionality of your earbud headphones. Now that we have covered the cleaning process, let’s move on to essential tips for maintaining clean earbuds in the next section.
Tips for Maintaining Clean Earbud Headphones
Storing earbuds properly
Proper storage is key to keeping your earbuds clean and protected. Avoid tossing them into your bag or pocket without any thought. Instead, consider investing in a dedicated earbud case or pouch. These handy accessories provide a safe and hygienic space to store your earbuds when not in use. Make sure to wind the cables neatly to prevent tangling, as tangled cords can attract dirt and debris. By storing your earbuds properly, you not only safeguard them from damage but also minimize the chances of dirt accumulation.
Avoiding exposure to moisture
Moisture is the nemesis of your earbuds, as it can lead to corrosion, reduced audio quality, and even malfunction. To maintain the longevity of your earbuds, it’s crucial to keep them away from water, sweat, and other liquids. Avoid using your earbuds in wet environments such as the shower or while swimming. Additionally, wipe off any moisture accumulated on the earbuds after an intense workout session. Remember, a little precaution goes a long way in preserving the longevity and performance of your earbuds.
Regularly inspecting and cleaning cables
While we often focus on cleaning the earbuds themselves, it’s equally important to pay attention to the cables. Over time, cables can accumulate dirt, dust, and even get tangled, affecting both aesthetics and functionality. Regularly inspect the cables for any signs of wear and tear, such as fraying or exposed wires. If you spot any damage, consider replacing the cables to maintain optimal performance. To clean the cables, gently wipe them with a microfiber cloth or a mild cleaning solution. By taking care of the cables, you ensure that your earbuds remain in top-notch condition for a prolonged period.
With these simple yet effective tips, you can keep your earbuds clean and in pristine condition. Proper storage, avoiding moisture exposure, and regular cable maintenance are key practices that contribute to the longevity and optimal performance of your earbud headphones. Now that you know how to maintain clean earbuds let’s move on to troubleshooting common issues that you may encounter.
Troubleshooting Common Issues with Earbud Headphones
Dealing with accumulated earwax
Earwax buildup is a common culprit behind reduced audio quality in earbud headphones. If you notice a decrease in volume or muffled sound, it’s time to tackle this issue head-on. Begin by gently removing the ear tips and cushions from your earbuds. Take a soft-bristled toothbrush or a cotton swab dipped in rubbing alcohol and carefully clean the nooks and crannies of your earbuds. Be cautious not to push the earwax further into the earphone or damage any delicate components. Once cleaned, allow the earbuds to dry completely before reattaching the ear tips and cushions.
Fixing distorted or muffled sound
Experiencing distorted or muffled sound can be frustrating, but fear not! There are a few troubleshooting techniques you can employ to rectify this issue. First, ensure that your earbuds are securely plugged into the audio source. Loose connections can cause audio problems. Secondly, inspect the audio jack for any dirt or debris and clean it using a soft cloth or compressed air. If the issue persists, try using your earbuds with a different device to determine whether the problem lies with the headphones or the audio source. Lastly, if none of these solutions work, it may be time to replace your earbuds.
Repairing loose connections
A loose connection can be an annoyance, causing intermittent sound or complete audio loss. To address this issue, begin by checking the connection between the audio source and the earbud cable. Ensure that it is securely plugged in and free from debris. If the problem persists, examine the cable for any visible damage or fraying. If you spot any, you may need to consider replacing the cable or seeking professional repair services. Remember to handle the delicate components of your earbuds with care to avoid further damage during the troubleshooting process.
By addressing these common issues with earbud headphones, you can restore the audio quality and extend the lifespan of your beloved earbuds. Troubleshooting with patience and care will help you overcome these challenges and continue enjoying your favorite sounds without any interruptions.
Conclusion
In a world filled with captivating audio experiences, it’s crucial to ensure that your earbud headphones stay clean and pristine. By following the step-by-step guide provided in this article, you can easily maintain optimal sound quality and extend the lifespan of your beloved earbuds.
Regular cleaning not only enhances your listening pleasure but also promotes good ear hygiene. By removing dirt, sweat, and earwax build-up, you not only preserve the audio fidelity but also minimize the risk of ear irritation and discomfort. Clean earbuds offer a comfortable fit, allowing you to enjoy your favorite music without any distractions.
Remember to store your earbuds properly, avoiding exposure to moisture and regularly inspecting and cleaning the cables. These simple maintenance practices can go a long way in preventing future issues and ensuring the longevity of your earbuds.
So, take a moment to care for your earbud headphones and unlock the power of pristine sound. With a little effort and regular cleaning, you can enjoy an immersive audio experience that truly captivates your senses.
Now, go ahead and put these cleaning techniques into action. Embrace the joy of crystal-clear sound and let your earbuds transport you to a world of musical bliss. Happy cleaning!