Introduction
The AirPods Pro have revolutionized the way we experience audio, providing a seamless and immersive sound experience. As you unbox your brand new AirPods Pro earbuds, it is crucial to understand the significance of pairing them correctly. In this comprehensive guide, I will walk you through the step-by-step process of pairing your new AirPods Pro earbud, ensuring you unlock their full potential.
Overview of AirPods Pro
AirPods Pro are the epitome of convenience and innovation. With their sleek design and advanced features, they offer an unparalleled wireless audio experience. These cutting-edge earbuds boast active noise cancellation, transparency mode, and adaptive EQ, delivering crystal-clear sound and exceptional comfort.
Importance of Properly Pairing a New AirPods Pro Earbud
Pairing your new AirPods Pro earbud correctly is not just a technicality; it is the key to unlocking their extraordinary capabilities. By following the correct pairing process, you can ensure a stable connection between your earbuds and your device, preventing any potential audio disruptions or connectivity issues. Moreover, proper pairing allows you to fully utilize the advanced features of the AirPods Pro, such as seamless switching between devices and personalized sound settings.
Brief Explanation of the Benefits of Following the Correct Pairing Process
When you pair your new AirPods Pro earbud correctly, you lay the foundation for an exceptional audio experience. By establishing a strong connection between your earbud and your device, you enable the AirPods Pro to deliver immersive sound quality, enhanced noise cancellation, and effortless device switching. Following the correct pairing process also ensures that your AirPods Pro receive the necessary software updates, guaranteeing optimal performance and compatibility.
Now that we understand the importance of proper pairing, let’s dive into the step-by-step guide to pairing your new AirPods Pro earbuds.
Understanding the Pairing Process
AirPods Pro offer a seamless pairing experience, ensuring you can effortlessly connect them to your device. Let’s explore the step-by-step guide on how to pair your new AirPods Pro earbud and troubleshoot any common pairing issues that may arise.
Step-by-Step Guide on How to Pair a New AirPods Pro Earbud
-
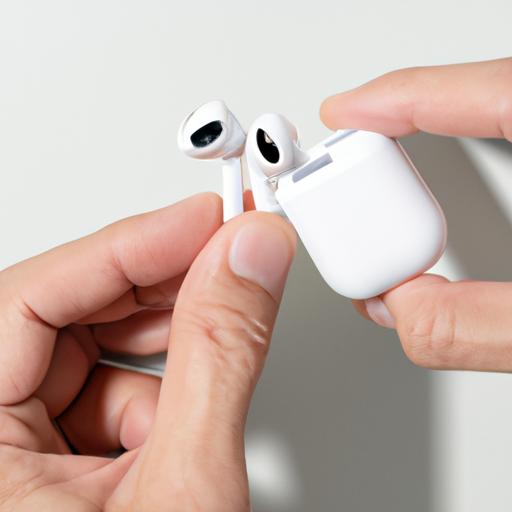
Unboxing the AirPods Pro
Start by unboxing your AirPods Pro earbuds. Remove them from their charging case and make sure they are charged and ready for pairing. -
Preparing the AirPods Pro for Pairing
Place the AirPods Pro earbuds in their charging case and ensure the lid is open. The earbuds should automatically enter pairing mode. If not, press and hold the button on the back of the charging case until the LED light starts flashing white. -
Initiating the Pairing Process on an iPhone or iPad
On your iPhone or iPad, go to the Settings app and navigate to the Bluetooth section. Make sure Bluetooth is turned on. Your AirPods Pro should appear in the list of available devices. Tap on them to initiate the pairing process. Follow the on-screen instructions to complete the pairing. -
Pairing with an Android Device
To pair your AirPods Pro with an Android device, open the Bluetooth settings on your device. Put the AirPods Pro earbuds in pairing mode by pressing and holding the button on the back of the charging case until the LED light starts flashing white. Your AirPods Pro should appear in the available devices list. Tap on them to establish the connection. -
Troubleshooting Common Pairing Issues
If you encounter any issues during the pairing process, don’t worry. Here are some common problems and their solutions:- If your AirPods Pro don’t appear in the Bluetooth settings, make sure they are charged and in pairing mode. Restart your device and try again.
- If you experience connection issues after successful pairing, ensure that your device’s Bluetooth is turned on and in range of the AirPods Pro.
- If you encounter error messages during pairing, reset your AirPods Pro by holding the button on the back of the charging case until the LED light turns amber, then white.
By following these simple steps and troubleshooting tips, you can successfully pair your new AirPods Pro earbud and enjoy a seamless audio experience. Next, we will explore some essential tips for ensuring a successful pairing process.
Tips for Successful Pairing
Pairing your new AirPods Pro earbud can be a breeze with these helpful tips. Follow these steps to ensure a seamless and successful pairing process.
A. Ensuring a Good Bluetooth Connection
Before initiating the pairing process, it’s crucial to ensure a strong Bluetooth connection. Make sure your device’s Bluetooth is turned on and in a range where it can establish a stable connection with the AirPods Pro. Avoid any physical barriers that may interfere with the signal strength, such as walls or other electronic devices.
B. Keeping the AirPods Pro and Device in Close Proximity During Pairing
To establish a reliable connection, keep your AirPods Pro and the device you are pairing them with in close proximity. This proximity allows for a stronger signal and faster pairing process. Ideally, keep the AirPods Pro case open and within a few inches of your device during the pairing process.
C. Checking for Software Updates
To ensure optimal performance and compatibility, it’s essential to regularly check for software updates for your AirPods Pro. Apple frequently releases updates that introduce new features, bug fixes, and improved performance. To check for updates, go to the Bluetooth settings on your device and select your AirPods Pro. If an update is available, follow the prompts to install it.
D. Resetting the AirPods Pro if Necessary
If you encounter any issues during the pairing process or experience connectivity problems, resetting your AirPods Pro can often resolve the issue. To reset them, place the AirPods Pro in their case, close the lid, and wait for about 30 seconds. Then, open the lid and press and hold the setup button on the back of the case until the LED indicator flashes white. Follow the standard pairing process to connect the AirPods Pro to your device again.
By following these tips, you can ensure a successful pairing experience with your new AirPods Pro earbud. Now that we have covered the essential tips, let’s move on to troubleshooting common pairing issues in the next section.
Troubleshooting Pairing Issues
Common problems faced during the pairing process
1. AirPods Pro not appearing in Bluetooth settings
It can be frustrating when your AirPods Pro fail to show up in the Bluetooth settings of your device. But fear not, as this issue can be resolved with a few simple steps. First, ensure that your AirPods Pro are charged and in close proximity to your device. If they still don’t appear, try resetting your AirPods Pro by placing them in the charging case, opening the lid, and pressing and holding the setup button until the LED light on the case flashes white. After resetting, attempt the pairing process again.
2. Connection issues after successful pairing
If you’ve successfully paired your AirPods Pro but are experiencing intermittent or poor connection, there are a few troubleshooting steps you can take. Start by ensuring that your AirPods Pro and your device are within close range and free from any obstructions that may interfere with the Bluetooth signal. Additionally, check for any software updates for your device and the AirPods Pro, as these updates often include improvements to connectivity. If the problem persists, try resetting your AirPods Pro and repairing them with your device.
3. Error messages during pairing
Encountering error messages during the pairing process can be disheartening. However, there are ways to overcome these obstacles. If you receive an error message, try restarting both your AirPods Pro and your device. This simple step can often resolve minor connectivity issues. If the error persists, ensure that your device’s Bluetooth is turned on and discoverable. It’s also worth checking if your device supports the AirPods Pro model you’re trying to pair. If all else fails, consult the Apple support website or reach out to their customer support for further assistance.
Troubleshooting steps to resolve these issues
When faced with pairing issues, it’s essential to follow a systematic approach to identify and resolve the problem. Here are some troubleshooting steps you can take:
- Ensure that your AirPods Pro are charged and in the vicinity of your device.
- Check if your device’s Bluetooth is enabled and functioning correctly.
- Verify that your device supports the AirPods Pro model you’re trying to pair.
- Reset your AirPods Pro by placing them in the charging case, opening the lid, and holding the setup button until the LED light on the case flashes white.
- Restart your device and attempt the pairing process again.
- Update your device’s software and check for any available firmware updates for your AirPods Pro.
- If the problem persists, consult official troubleshooting guides or reach out to customer support for further assistance.
By following these troubleshooting steps, you can overcome common pairing issues and ensure a seamless connection between your AirPods Pro and your device.
Pairing AirPods Pro with Additional Devices
A. Explaining the Process of Pairing AirPods Pro with Multiple Devices
You may be wondering, can I pair my AirPods Pro with more than one device? The answer is a resounding yes! Apple has made it incredibly convenient to use your AirPods Pro with multiple devices seamlessly. Here’s how you can pair your AirPods Pro with additional devices:
-
Ensure Bluetooth is enabled: Make sure the Bluetooth feature is turned on for the device you want to pair with your AirPods Pro. Navigate to the device’s settings and toggle the Bluetooth option.
-
Open the AirPods Pro case: Open the lid of your AirPods Pro case. Keep the earbuds inside the case during the pairing process.
-
Access the Bluetooth settings: On the device you want to pair with, go to the Bluetooth settings. You can usually find this in the device’s settings menu or control center.
-
Tap on your AirPods Pro: In the list of available Bluetooth devices, locate your AirPods Pro and tap on them to initiate the pairing process.
-
Follow on-screen instructions: Depending on the device, you may be prompted to confirm the pairing or enter a passcode. Follow the on-screen instructions to complete the pairing process.
B. Tips for Seamless Switching Between Devices
Switching between devices while using your AirPods Pro is a breeze. Here are some tips to ensure a smooth transition:
-
Enable Automatic Device Switching: Ensure that your devices are updated to the latest software versions that support Automatic Device Switching. This feature allows your AirPods Pro to automatically switch between devices based on which one you’re using.
-
Keep devices close: For optimal performance, keep the devices you want to switch between in close proximity. This ensures a strong and stable Bluetooth connection.
-
Disconnect from the current device: If you want to switch your AirPods Pro to a different device manually, simply disconnect them from the current device’s Bluetooth settings. Then, connect them to the desired device following the pairing process mentioned earlier.
C. Troubleshooting Common Issues When Pairing with Multiple Devices
Pairing AirPods Pro with multiple devices can occasionally present some challenges. Here are some common issues you might encounter and how to troubleshoot them:
-
Connection difficulties: If your AirPods Pro are not connecting to a device, try turning Bluetooth off and on again on both the AirPods Pro and the device. If the problem persists, restart both devices and attempt the pairing process again.
-
Audio switching problems: If your AirPods Pro are not automatically switching between devices, ensure that Automatic Device Switching is enabled on all your devices. If it still doesn’t work, try manually disconnecting and reconnecting them to the desired device.
By following these steps and troubleshooting tips, you can easily pair your AirPods Pro with multiple devices and enjoy a seamless audio experience across all your devices.
Conclusion
Pairing a new AirPods Pro earbud is a simple yet crucial process that sets the stage for an exceptional audio experience. By following the step-by-step guide outlined in this article, you can ensure a seamless connection between your AirPods Pro and your device, unlocking their full potential.
Throughout this guide, we have emphasized the importance of properly pairing your new AirPods Pro earbud. By doing so, you enable features like active noise cancellation, transparency mode, and adaptive EQ, which enhance your listening experience to new heights. Additionally, correct pairing allows for effortless device switching and personalized sound settings, tailored to your preferences.
Remember to keep your AirPods Pro and your device in close proximity during the pairing process, ensuring a strong Bluetooth connection. Regularly check for software updates to ensure optimal performance and compatibility. If you encounter any issues, refer to the troubleshooting section for solutions to common problems.
Now, armed with the knowledge of how to pair your new AirPods Pro earbud, you can embark on a journey of immersive sound and convenience. Enjoy the freedom of wireless audio like never before and savor the crystal-clear sound that AirPods Pro deliver.
Feel free to share your experiences and ask any questions in the comments section below. Happy pairing!